Rakhi [Raksha Bandhan Festival 2026] Online Gifts
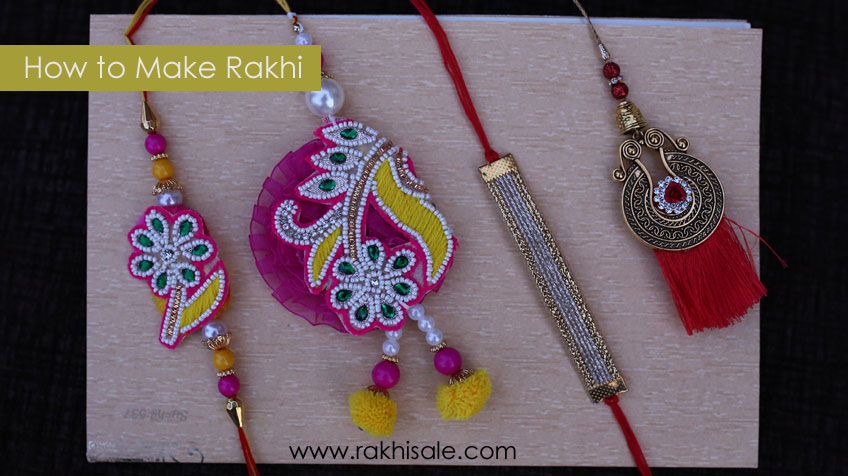
How to Make Handcrafted or Handmade Rakhi
May 11, 2019Handmade Rakhi is the best way to show affection for your brother. Know with us how to make Rakhi at home.
Rakhi is the sacred amulet, which comprises not only a sister's love and emotions but also good wishes for her brother's long life and well-being. Some more intimate touch can be added to this amulet by taking a little pain for these homemade Rakhis. Try this simple and easy method of Rakhi making and impress your brother with your creativity.
Rakhi is the physical symbol of the emotions involved with the festival-the feelings of love, affection, and care. It is the sentiments that matter on this day and what can be a better expression of the sisterly love than a self-made Rakhi.
Homemade art and craft items can serve as an ideal gift on Raksha Bandhan. On this Raksha Bandhan, let your creativity flow out. Though money can buy the best gift from the market, yet nothing compares to the pleasure and pride of making gifts with our own hands for our loving brother or sister. Besides being less expensive, they depict your love and affection that you have for your other sibling. We are suggesting some of the ideas for these arts and crafts that you will enjoy.
Rakhi is generally a decorated silk thread. It may be a simple thread, or it may be decorated with beads or designer motifs, religious symbols or even studded with jewels. Here are a few tips on how you can create your own Rakhi.
Handcrafted or Handmade Rakhi
Required materials:
- A silk thread reel (colour of your choice, preferably red or green)
- A cotton thread reel (matching to the silk reel colour)
- Toothbrush (an old one)
- Scissors
- Glue
- Small artificial pearls (10-12)
Method 1:
- Take the silk thread reel and cut its 20-25 pieces, each one around 25 inches long.
- Hold the pieces in such a way that both of their ends meet each other and then fold entire bundle threads at the midpoint.
- Take the cotton reel and tie the bundle with the help of cotton thread just 4-5 inches below the midpoint.
- Divide the more extended portion of the thread bundle into two equal parts.
- Plait both the divided portions separately and tie a small piece of cotton thread at both ends, leaving a margin of 2 inches. Thus the more extended amount makes the string part of Rakhi.
- The smaller part of the Rakhi is still in loops because of the fold. Take the scissors and cut the circles right at its centre. It will make the central part of the Rakhi.
- Take a toothbrush and comb that central part in all directions in such manner that a circle of the tiny threads prepared.
- Both the ends of the strings must also be brushed. Brushing the threads will make it even softer and give it a feathery look.
- Finally, stick the small pearls on the central part of the Rakhi with the help of glue.
Note:
- The pearls stuck randomly will appear as dew on the flower with the red silk thread background.
- While the same pearls stuck on green silk thread background will look like dew on the grass.
- This central part of the Rakhi can be decorated in various creative ways with different decorative materials.
Method 2:
- Take a bunch of silk threads, multicoloured if you want a colourful Rakhi. Red and yellow are considered bright colours. You can also use a strand or two of golden thread. The threads should be around 30" long.
- Fold the length of the thread bunch to half. Tie a tight knot at one-fourth of the length using the cotton thread. Cut the loops of the folded thread and fluff the open ends with a hard brush.
- Divide the longer part of the thread into two halves and plat them in the desired way. Tie the ends with the cotton thread and fluff the open ends. These two strands will be used for the tying.
- Decorate the upper part with sequins, beads or religious motifs. If you are using multi coloureds arranged in some specific way, cut them short to a suitable length not more than ½".
Traditional Rakhi
These days in fashion are Rakhis made of Kaleva or Moli (the red thread used for tying on the wrist during a religious event). These are more suitable for those who have to keep Rakhi tied for a longer time, as in some faiths when it is removing after ten days (Goga Navmi), or it will release on the Dussehra, which falls in October.
Materials required:
- Moli or Kalava
- Cotton Thread
- Scissors
- Glue
- Religious Symbol/ Rudraksha
- Tulsi/ Sandalwood Beads or Tiny Shells
Take a 50" long thread and fold it in the middle. Plat the thread in the desired manner. Tie the cotton thread leaving some space at the ends. Remove all the loops from the ends. Stick the religious symbol or rudraksha in the middle and if you want to decorate the rest of the length of the Rakhi with beads or tiny shells. You can stick them or even stitch them on the braided thread.
Method 4:
- Take 20-24 inches long silk thread strands in a bunch if you want to make multi-coloured Rakhis take silk threads of different colours.
- Tie a tight knot with a cotton thread on the one-fourth part of the silken thread bunch. The one-fourth part will be made into a Rakhi while the three-fourth will be the string to tie around the wrist.
- Now make sure the heads of the silk threads of the one-fourth part of the bunch do not remain in loops, in case they are, cut them with a pair of scissors.
- Once they are independent of loops, with a toothbrush rub hard on these threads and brush them with strong strokes by holding tight on the knot. With repeated strokes, the silk threads turn fluffy and soft.
- To make the string, divide the three-fourth part of the silk thread into two equal parts and plait them separately. At the end tie a knot and brush the end again.
- Once this is done, decorate it with beads or sitaras. Stick them with glue. You can purchase the sponge of a suitable colour, cut it into a star shape, decorate it with beads or sitaras. Golden threads can be entwined used for decoration. And then stick it with glue.
Method 5:
- Knot the thread uniquely, Put the beads in the threads. Put a locket in the middle of the beads. Then at last tie both the ends.
- Your fabulous Rakhi for Raksha Bandhan is ready!
Method 6: Photo-frame Rakhi
When making Rakhi, make an empty frame in the round shape so that your sister can put her photo in the frame, for whom the Rakhi is mentioned. This will give a good expression of the excellent relation between sister and brother.
Method 7:
Instead of making the base of the Rakhi in the traditional way (Resham), one can use varied fancy silk or net, by doing running stitch on one side of a rectangular piece. By stretching the thread, one can get around the base that looks trendy as well as different. To make it look nicer, one can add layers of the same in different colours.
Method 8: Teddy Rakhi
Materials Required:
- Fevicol
- Scissors
- Old cloth from dupatta or T-shirt
- Mummy's bindis
- Cotton
- Any colour ribbon
- Sewing thread and needle
- Sparkles
How To Make Teddy Face -
- Take a piece of an old t-shirt and fill it with cotton.
- Fold it in a round shape.
- Stick black beads for eyes and a red bindi for lips.
How to make Teddy's Body -
- This time take a little bigger cloth, fill it with cotton in the round shape for Teddy's body.
- You can put sparkles and make Teddy's dress colourful and attractive.
- Now, glue or sew the face and the body with a thread.
- For the wrist, tie a ribbon to the teddy.
- Your Teddy Rakhi is ready!!
Method 9: Gold & Silver Coin Rakhi:
- Take two or three colours of silk thread, preferably Gold, Silver & Red.
- Get Gold or silver coins from the gold shop & get gold & silver colour net cloth that can be kept under the coin, which gives a luxurious look.
- Take the net cloth to give it a good shape & make a hole in between the fabric, which can attach the fabric & the threads.
- Take a combination of red & gold silk thread.
- Make a knot as per your convenience but not in the middle because that should be the joining for the coin, net cloth & thread. Leave the thread open on the two ends.
- Your Gold Coin Rakhi is ready.
Method 10: Computer Rakhi
- Method for making the Monitor: Cutout the two narrow sides of the matchbox.
- Now stick the two remaining broader sides with glue.
- Cover them with grey paper& write WINDOWS on it in capitals.
- Please give it a bright border with coloured tape.
- Cover with a transparent plastic sheet.
- Method for making the Keyboard:
- Take narrow sides of the matchbox cover left and cover it with fluorescent colour paper.
- Draw the keys with a sketch pen.
- Method for making the Mouse:
- Take the peel of pistachio nut.
- Draw the keys of the mouse with painting colours.
- D. Assembling:
- Take a red colour ribbon.
- Paste the keyboard on the ribbon & monitor on the back of the keyboard.
- Now join the mouse with a thick thread from the end of the keyboard.
- Glue the mouse to the ribbon.
Method 11: God Rakhi
Materials Required:
- Coloured thread
- Few golden beads
- Small-sized buttons
- A small picture of a Goddess or religious symbol
Take a coloured thread and tie about five golden beads and a small button after it. Repeat this along the entire length of the thread. Paste any religious picture or symbol on the button in the middle of the thread. Your homemade Rakhi is ready.
Method 12: Paper Flower Bouquet
Required materials:
- Three Colored paper sheets (1 red, one green, one brown)
- Scissors
- Five small sticks
- Pencil and rubber
- Small piece of satin ribbon
- Perfume
- Method: Take the red sheet and draw on it the flowers of your choice.
- Cut the red sheet according to the outlines of the flowers drawn on it.
- Then take a green sheet and draw leaves of the flowers on it.
- Again cut the green sheet according to the outlines of the leaves drawn on it.
- Take the sticks and wrap them all well with the help of a brown sheet.
- First, push the cuttings of leaves into the stick one by one about 1/2 inch inside one of its end.
- Then similarly move the red flowers into the sticks one by on top of the leaves.
- When all the sticks are ready as a beautiful flower, then hold all of them together and tie them with the satin ribbon to make a bouquet.
- Spray a very little quantity of perfume on the scent so that the fragrance gives a natural appearance to the flowers.
Method 13: Homemade White Cat
Required materials:
- One old cold-drink can
- One fused zero power round bulb
- One bundle of cotton
- One pair of eyes
- Small piece of a black paper sheet
- A small part of a red paper sheet
- Small piece of red satin ribbon
- Glue
Method:
- Take can and make a hole in the centre of a top portion of the can so big so that the narrower portion of the bulb could fit into that.
- Then completely cover the outer portion of the can with the cotton.
- Similarly, cover the bulb with the cotton.
- Adjust the bulb in the hole made in the can.
- Then cover the neck part (joining portion of the can and bulb) of the cat with the cotton finely.
- Stick the eyes on the bulb.
- Take a 4" x 1.5" rectangular piece of black paper. And cut it in the form of a moustache.
- Stick the moustache on the face of the cat.
- Cut a small square piece of red paper and stick it as lips of the cat.
- Tie the satin ribbon on the neck portion of the cat.
- This cute white cat is ready to be hugged and curdled.


More Posts
- Special Lumba Bhabhi Rakhi
Jun 28, 2021 - Unique Rakhi Gift Ideas
Jun 24, 2021 - Rakhi with Chocolates for Brother
Apr 08, 2021 - Send Online Rakhi to Siblings
Apr 01, 2021 - How to Send Rakhi Gifts India
Mar 30, 2021